We have a team of experienced engineers and all possible equipment to make a successful trial.
Our engineers have 10 – 35 years experience in injection molding, we keep us always up to date with the newest technologies and equipment
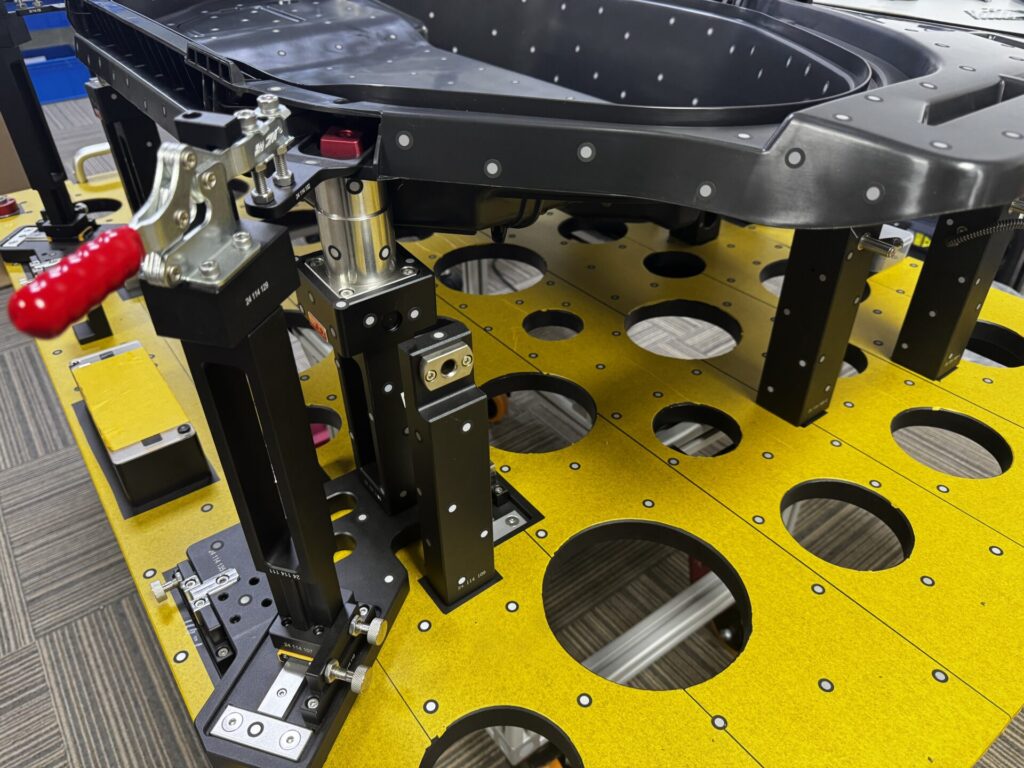
Equipment
- ComoNeo Kistler pressure sensor system (8 x pressure & 8 x temperature)
- Data flow Kistler (8 x pressure x 8 x temperature)
- Thermal image
- Cooling Flow meter
- Temperature checker
- all kind of scales
- Digital controller for Hot runner heating (tol. +-0.5%)
- Humidity checker
- and all necessary small tools
A scientific molding process is an efficient and repeatable molding process which is stable and reliable with a large processing window. Although there are many facets to a scientific molding process, the general attributes are as follows:
Phase 1
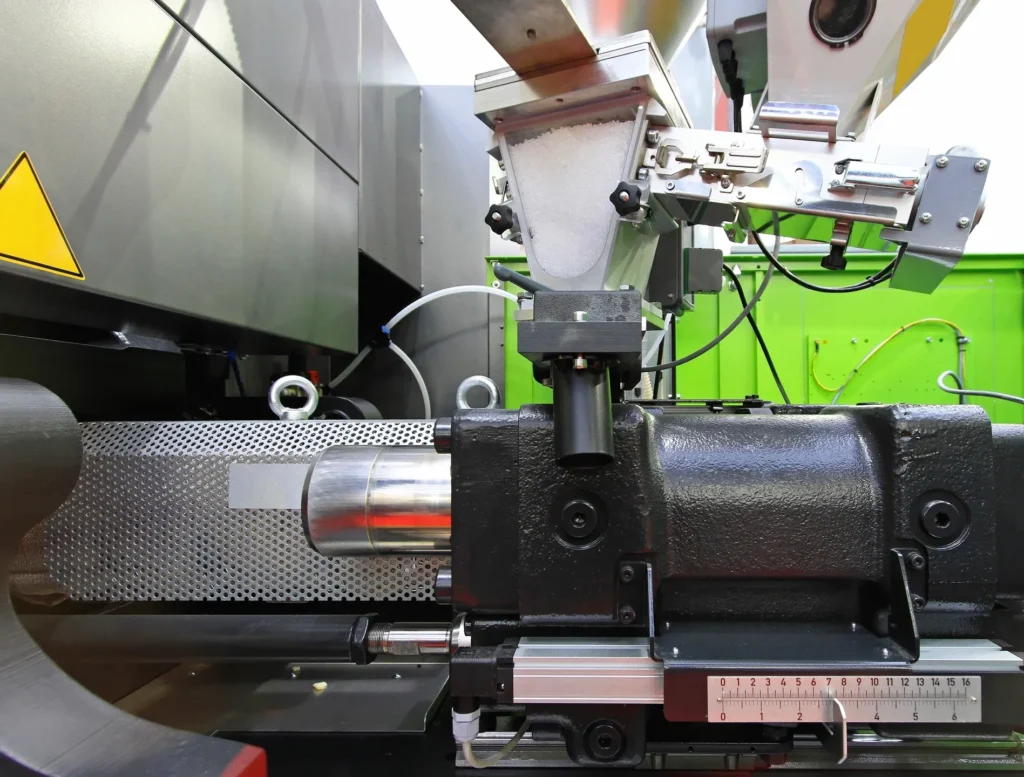
Material Preparation & Machine Readiness
1. Material Drying: Hygroscopic polymers (e.g., Nylon, PC, PET) must be dried to a specific moisture content (measured in %). This is critical to prevent defects like splay (silver streaks) or molecular degradation.
2. Machine Preparation: The molding machine is set up with the correct mold, and the barrel temperature zones are set according to the material supplier’s recommendations. The mold itself is prepped with proper cooling lines and, if applicable, connected to auxiliary equipment like chillers or temperature controllers.
Phase 2
The Four Critical Plasticating & Injection Steps
This is the core of scientific molding, where key process parameters are established and documented.
Step 1:
Establishing Viscosity Curve (Rheology Study)
* Goal: To understand how the material flows under different injection speeds, independent of pressure.
* Process: The technician performs a series of short shots (incomplete fills) at a constant melt and mold temperature, but with varying injection speeds (e.g., from very slow to very fast).
* Output: A graph of fill time vs. injection pressure (or cavity pressure). The „sweet spot“ is a fill speed where the pressure is relatively stable—indicating the material’s viscosity is not sensitive to small speed variations. This determines the optimal injection velocity profile.
Step 2:
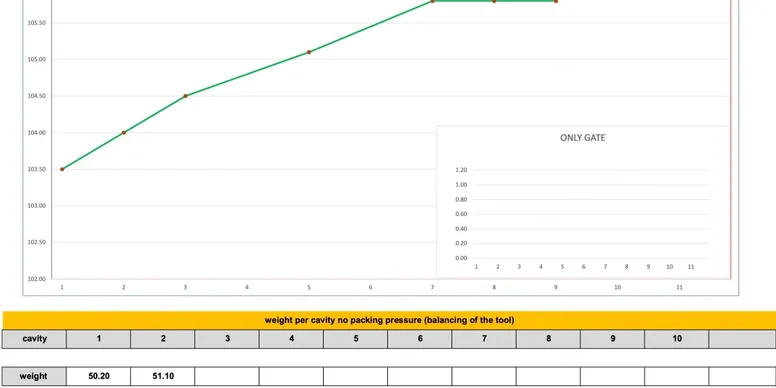
Establishing Gate Seal Time
* Goal: To find the exact point where the gate (the entrance to the cavity) freezes off, ensuring consistent part weight and packing.
* Process: Starting with a very short pack/hold time, mold a series of parts, gradually increasing the pack time in small increments (e.g., 0.2 seconds). Weigh each part.
* Output: A graph of part weight vs. pack time. The point where the part weight no longer increases is the gate seal time. The process pack time is then set slightly longer than this point to ensure consistency.
Step 3:
Establishing Cooling Time
* Goal: To determine the minimum time needed for the part to solidify enough to be ejected without distortion.
* Process: Starting with a conservative cooling time, gradually reduce it in small steps while monitoring the part for ejection issues, warpage, or dimensional changes.
* Output: The minimum cooling time required for a stable process. A safety margin is added for the final setting.
Step 4:
Establishing the Process Window (DOE - Design of Experiment)
* Goal: To find the robust combination of melt temperature, mold temperature, and packing pressure that yields acceptable parts.
* Process: Systematically vary these key parameters (within a specified range) and measure critical part dimensions, weight, and appearance.
* Output: A process window—a graphical or documented range for each parameter where the part meets all specifications. The final process is set in the middle of this window for maximum robustness against normal machine variation.
Phase 3
Process Documentation & Standardization
* All parameters established above are documented on a Process Sheet or in the machine controller. This becomes the „recipe.“
* Critical process limits (alarms) are set for parameters like:
* Cushion: The small amount of unmelted plastic left in front of the screw after packing. Monitored for consistency.
* Peak Cavity Pressure & Time: The maximum pressure inside the mold and when it occurs.
* Fill Time: Must remain within a tight window.
* This creates a Master Process that can be precisely replicated on any capable machine.
Phase 4
Production & Process Control (Monitoring)
* The process runs using the established „recipe.“
* Instead of just checking parts at the end, the machine continuously monitors the key process parameters (cushion, fill time, peak pressure, etc.).
* If a parameter drifts outside the set control limits, the machine alarms. This indicates something has changed (material, machine, mold), and the root cause must be found and corrected before defective parts are produced. This is a shift from detection to prevention.
Key Advantages
Key Advantages of Scientific Molding over Traditional („Tribal Knowledge“) Molding:
* Repeatability: The process can be transferred between machines and shifts with minimal variation.
* Reduced Scrap & Downtime: Problems are predicted and prevented by monitoring process parameters, not just part quality.
* Faster Setup: Established recipes allow for much quicker mold startups.
* Data-Driven Problem Solving: Defects can be correlated directly to specific parameter deviations, making root cause analysis faster and more accurate.
* Optimized Cycle Time: Cooling and gate seal times are minimized based on data, not guesswork.
In essence, scientific molding transforms injection molding from an art into a controlled engineering discipline, ensuring predictable, high-quality production.
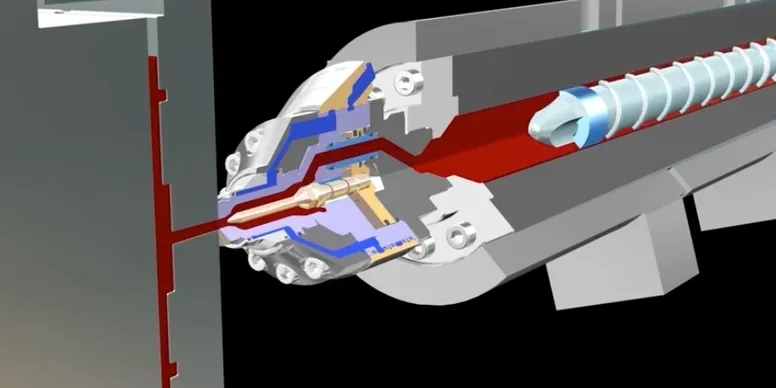
1. FILLING
Since polymer viscosity decreases as injection rate is increased, higher injection speeds allow the polymer to flow into the mold more easily. At these higher rates, shear thinning causes more consistent viscosity. This promotes a more consistent and reliable process.
more
Using a single injection speed simplifies the process and improves consistency. If defects occur with one speed, then multiple speeds can be used. This is referred to as ‘injection profiling’. The best use of injection profiling is to solve specific defects.
When filling, it is critical to ensure you are not using a ‘pressure limited’ process. If the maximum injection pressure setting is inadequate, the screw will slow down during injection to create what is known as a ‘pressure-limited process’. When injection becomes pressure-limited, the machine can no longer maintain the desired injection rate, resulting in an inconsistent fill rate and injection time.
2. SWITCHOVER
You should transfer from 1 st stage fill to 2nd stage pack before the mold is completely filled to ensure optimal efficiency and consistency. Such a process will be able to better compensate for variations in material viscosity.
more
With a poorly established transfer, an increase in viscosity is likely to cause a short shot, while a decrease in viscosity results in flash. A process with fluctuating transfer is unlikely to be consistent over time, resulting in flash, short shots, and sinks.
3. PACKING
To determine the appropriate 2 nd stage time for your process, you should perform a Gate Seal Study. This study determines adequate 2 nd stage packing time by graphing part weight vs. 2 nd stage time.
more
When graphed, the part weight will increase until the gate freezes. The optimal 2 nd stage time is the time at which the part weight does not increase with an increase in 2 nd stage time.
4. SCREW DELAY ?COMPRESSION BEFORE RECOVERY
To prevent screw damage during recovery, either screw delay or screw decompression can be used. The screw delay option adds a delay after 2 nd stage packing to relieve the pressure on the screw prior to recovery.
more
Although each process is different, the screw delay time should be enough to allow the injection pressure graph to drop to zero before recovery starts.
In some high-speed applications, screw decompression or suckback can be used to relieve the pressure at the front of the screw. This option backs the screw up before starting screw recovery.
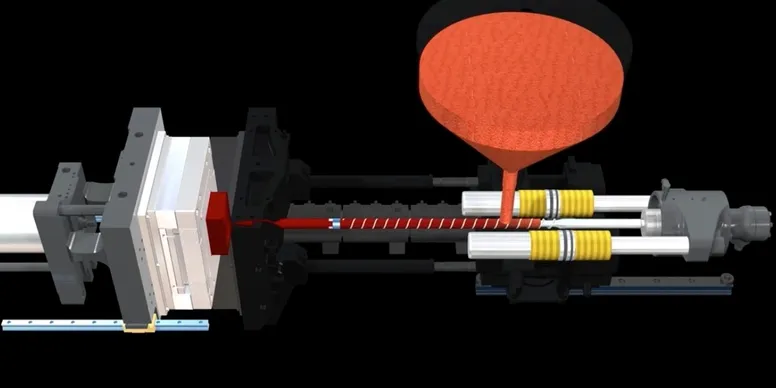
5. SCREW RECOVERY
To determine the optimal feed zone temperature for your process, you should perform a feed zone temperature study.
more
The purpose of the feed zone temperature study is to determine an adequate feed zone temperature by graphing screw recovery time versus feed zone temperature. When graphed, the screw recovery time will drop and then rise as the temperature is increased. The optimal feed zone temperature is the temperature at which the screw recovery time is the lowest.
Once the feed zone temperature is determined, adjust the rotational speed of the screw so that recovery consumes 80% of the overall cooling time. For example, if your process has a 10 second cooling time, your shot should be recovered approximately 2 seconds before the cooling time is finished.
6. SCREW DECOMPRESSION
For most screws, the optimal amount of ‘screw suck back’ should be equal to the amount of ‘check ring travel’. Since the size and configuration of check ring assemblies vary, you should ask the manufacturer or pull the screw and measure the check ring travel.
7. COOLING
To establishing cooling, begin with a longer cooling time than should be necessary. You can first determine the lowest mold temperature which provides an acceptable part.
more
Once this mold temperature is established, you can lower the cooling time to determine the lowest cooling time which provides an acceptable part.
8. DOCUMENTATION
The documented process outputs are those which result of a process where acceptable parts are produced. Many of these parameters are the same as the process inputs but each of these parameters would be consistent from one machine to another.
more
Examples of machine independent process parameters include:
• Melt Temperature
• Coolant Temperature Entering and Leaving the Mold
• Coolant Flow
• 1 st Stage Fill Time
• 1 st Stage Fill Weight
• 2 nd Stage Packing Time
• 2 nd Stage Plastic Pressure
• Gate Seal Time
• Cooling Time
• Plastic Back Pressure
• Screw Recovery Time
• Overall Cycle Time
• Final Part Weight
• Clamp Tonnage
We also document any important information such as photographs, observations, and quality information.


